On this blog, posts about Microsoft software are as rare as Rocking Horse sh manure. But I have to get my hands dirty for a few hours each week, in my part-time network support job.
Although VB.classic (aka VB6) was replaced many years ago by VB.net, it lives on in the form of VBA (Visual Basic for Applications).
And if I need to gather information about networked Windows computers, I like to write VB code within Excel, and draw on the power of WMI (Windows Management Instrumentation).
The good old days!
Yes, enough time has now passed since the introduction of VB.net that I can reminisce about the virtues of VB6. Possibly the best feature was the Help documentation.
For a thickie like me, a wordy description of a method or event is generally not enough. I like this backed up by a clear example, so if I don't know what the author is talking about, I can run the example and work it out from there. In most cases, VB.classic provided example code along with the definition of whatever you were struggling with.
Excel still supports VBA, even on the newer Office versions with that hideous toolbar...

...you just have to go to Options and enable the "Developer" tab. From here you just click the Visual Basic icon.
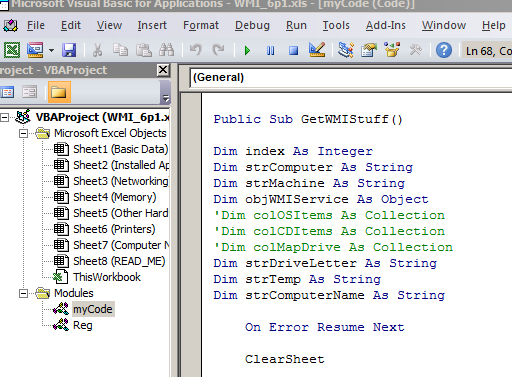
Hooray! Its like coming home after a long trip, isn't it?
Why Excel
Running VBA in Excel means that you have a ready made user interface. Data can be displayed in pages (spreadsheets) within a workbook, you can graph your data, print it and the file can be saved if necessary.
Using WMI
WMI is a great and easy way to grab information from networked Windows computers. When I say information, this includes hardware, firmware, software, the Registry and other system settings. There must be hundreds (possibly thousands) of properties spread over many WMI objects.
Here is an example which collects processor information using the Win32_Processor class.
Start by adding a command button to a spreadsheet, and set it to call a function called GetWMIData.
Then add this code to a VBA module:-
Public Sub GetWMIData()
Dim strComputer As String
Dim index As Integer
strComputer
= "." 'test on local pc using "." or use pc name (local or remote computers)
'create
a win management object
Set objWMIService = GetObject("winmgmts:" _ & "{impersonationLevel=impersonate}!\\" _
& strComputer & "\root\cimv2")
'create
a collection of all items in Win32_Processor
Set colUPItems = objWMIService.ExecQuery _ ("Select * from Win32_Processor")
'Get
some processor info
index = 1 For Each objItem In colUPItems
ActiveSheet.Range("A" & index).Value = "Processor Speed/Id:"
ActiveSheet.Range("B" & index).Value = objItem.MaxClockSpeed & "MHz"
ActiveSheet.Range("C" & index).Value = objItem.Name
Next
Set objWMIService = Nothing
End Sub
Once this is running, it is easy to create objects from other Win32_ classes. Let's get some BIOS information:-
Set colSMBIOS = objWMIService.ExecQuery _
("Select * from Win32_BIOS")
index = index + 1
For Each objBIOSItem In colSMBIOS
ActiveSheet.Range("A" & index).Value = "BIOS Manufacturer"
ActiveSheet.Range("B" & index).Value = objBIOSItem.Manufacturer
ActiveSheet.Range("C" & index).Value = objBIOSItem.BIOSVersion
Next
And finally, is anyone currently logged-on?
Set colPCItems = objWMIService.ExecQuery _
("Select * from Win32_ComputerSystem")
index = index + 1
For Each objPCItem In colPCItems
ActiveSheet.Range("A" & index).Value = "Logged On User:"
ActiveSheet.Range("B" & index).Value = objPCItem.UserName
ActiveSheet.Range("C" & index).Value = "Domain or Workgroup:"
ActiveSheet.Range("D" & index).Value = objPCItem.Domain
Next
More info on WMI Win32_ classes here
No comments:
Post a Comment